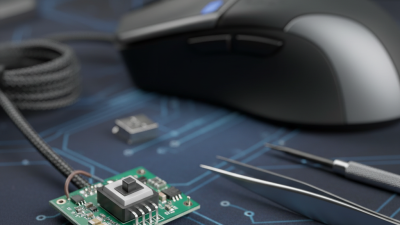
How to Use a Micro Switch On Off in Your Projects?
Micro switches are essential components in many electronic devices. They provide a reliable method for user interaction. According to recent industry reports, the global market for micro switches is projected to reach $1.2 billion by 2025, showcasing their significant role in automation and control systems. Projects involving micro switches will benefit from understanding how to harness their capabilities effectively.
Micro Switch On Off switches are often utilized in various applications, including appliances, automotive, and industrial machinery. These devices enhance safety and efficiency. They can switch devices on or off with minimal physical effort. However, precise application and integration can be challenging. Many users overlook proper placement, leading to inconsistent performance.
Incorporating a Micro Switch On Off in your project might seem straightforward. Yet, miscalculations in load and voltage can lead to failures. Industry feedback indicates that 30% of new projects face issues in this area. Engineers need to test thoroughly and consider environmental factors. Understanding these nuances ensures successful implementation and long-term reliability.
Understanding Micro Switches: Basics and Applications
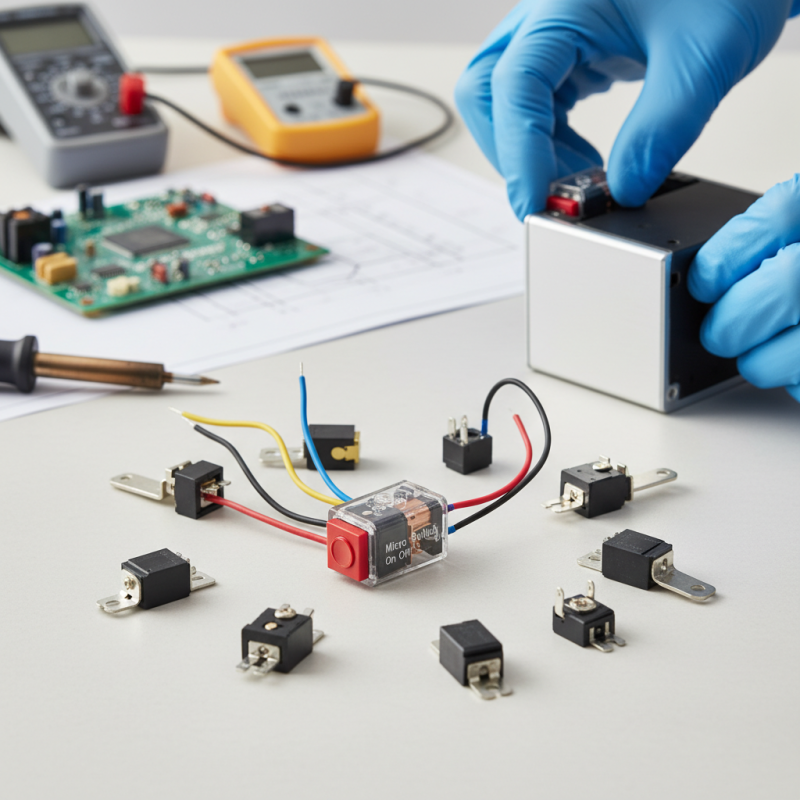
Micro switches are small yet powerful components essential in many electronic projects. They operate with minimal force and provide reliable on/off functionality. Understanding how they work will enhance your electronic skills. Typically, micro switches include three terminals: common, normally open, and normally closed. These configurations allow for versatile applications.
When using micro switches, pay attention to how they are mounted. An improper or loose installation can lead to erratic behavior. To ensure a solid connection, use appropriate screws or mounts. Testing your switch before integrating it into a larger project can prevent future issues. Learn through tinkering and keep refining your approach.
Tips: Be cautious with the specifications. Each micro switch has a specific rating for voltage and current. Don't exceed these limits. Always opt for switches rated for your particular application. Don't rush your connections. Take time to double-check wiring. A simple mistake can ruin your entire project.
Micro Switch Applications and Usage Statistics
Types of Micro Switches: Choosing the Right One for Your Project
When selecting a micro switch for your projects, understanding the types is crucial. Micro switches come in various configurations. Some have different actuator types, like levers or rollers. Others vary in their operating force, size, and mounting options. These differences impact how you can effectively use them in your designs.
Consider your project's specific needs. A snap-action switch might be ideal for tight spaces. If your application requires higher durability, opt for a sealed version. These can withstand dust and moisture. However, the choice isn't always clear. Sometimes, a micro switch appears perfect on paper but falls short during actual use. Planning and testing are vital steps.
Using the wrong type can lead to failures. For example, a micro switch with too low a rating could burn out. It's essential to balance size and power requirements. A switch that’s too small might not handle the load. Reflecting on your past experiences with micro switches can guide better choices. Aim for reliability.
Wiring a Micro Switch: Step-by-Step Instructions
Wiring a micro switch is an essential skill for many electronic projects. Micro switches are compact and reliable. They can handle various voltage and current levels, making them versatile for applications from simple DIY projects to complex machinery. According to industry reports, around 80% of electronic devices utilize some form of switching technology.
Begin by gathering your materials. You’ll need a micro switch, wire strippers, soldering equipment, and a breadboard or PCB. Identify the terminals on the micro switch: usually, there are three – common (COM), normally closed (NC), and normally open (NO). Strip the wire ends and connect the COM terminal to your power source.
Tips: Ensure your connections are secure. Loose wires can lead to erratic performance. Consider testing your switch with a multimeter before fully integrating it into your project. It's crucial to verify that your switch performs as expected under load conditions.
When designing your circuit, remember that the placement of the micro switch can affect its responsiveness. Testing different placements can yield different results. Document these changes. Every adjustment provides valuable data, helping refine your project. Balancing form and function might take time, but this iterative process builds a more robust design.
How to Use a Micro Switch On Off in Your Projects? - Wiring a Micro Switch: Step-by-Step Instructions
| Step Number |
Description |
Tools Required |
Estimated Time |
| 1 |
Gather all necessary components including the micro switch, wires, and a power source. |
Wire Stripper, Soldering Iron |
10 minutes |
| 2 |
Identify the terminals on the micro switch: Common (COM), Normally Open (NO), and Normally Closed (NC). |
Multimeter |
5 minutes |
| 3 |
Connect the power source to the COM terminal and the device to the NO terminal for an on-off control. |
Screwdriver |
15 minutes |
| 4 |
Secure all connections and ensure they are insulated to prevent shorts. |
Electrical Tape |
10 minutes |
| 5 |
Test the circuit by activating the switch to ensure proper operation. |
Testing Equipment |
5 minutes |
Integrating Micro Switches in Circuit Designs: Key Considerations
Micro switches are compact and versatile components. They have a simple mechanism that allows them to act as on-off switches in various projects. When integrating micro switches into your circuit designs, consider their physical placement. Ensure they are easily accessible for operation. Their size can also affect space within your design, so plan accordingly.
Wiring is another critical aspect. Keep connections short to reduce resistance and maintain signal integrity. It's essential to check each connection for reliability. A poorly connected switch could lead to intermittent operation. Test the switch multiple times. Observe how it performs under different conditions. Sometimes, micro switches can be too sensitive. You may need to adjust the force required for activation. This is part of refining your design.
Ultimately, think about user interaction. Does the switch placement make sense? Should you use tactile feedback? Gathering user input can provide valuable insights. Iterate on your design based on feedback. This approach can lead to a more user-friendly outcome. Embrace the imperfections; they can lead to better solutions.
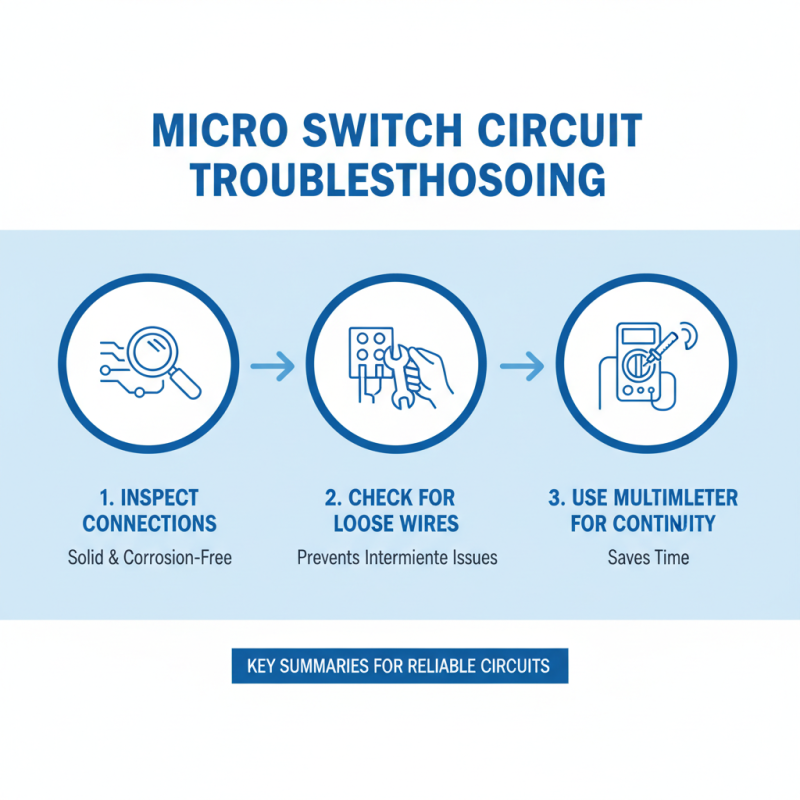
Testing and Troubleshooting Micro Switch Circuits: Best Practices
When working with micro switch circuits, testing and troubleshooting are key. Start by inspecting the connections. Ensure they are solid and free of corrosion. A loose wire can lead to intermittent issues. Use a multimeter to check continuity. This simple step can save time later.
When your circuit doesn’t work, don’t panic. Check the switch's actuator. It should move easily. If it’s stuck, clean it. Dust can accumulate and affect movement. Sometimes, the switch itself may fail. In such cases, consider replacing it. Consider using a breadboard for quick circuit testing.
During troubleshooting, document your steps. Record what you've tested or changed. This will make it easier to identify patterns. If something goes wrong, retrace your steps. Reflect on what might have been overlooked. This process is not always straightforward. Learning from mistakes is part of the journey. Each test brings you closer to a workable solution.