How to Install a Double Rocker Switch Correctly?
Installing a Double Rocker Switch can seem straightforward. However, many people face challenges during this process. A Double Rocker Switch allows control over two separate circuits. Understanding its installation is vital for safety and functionality.
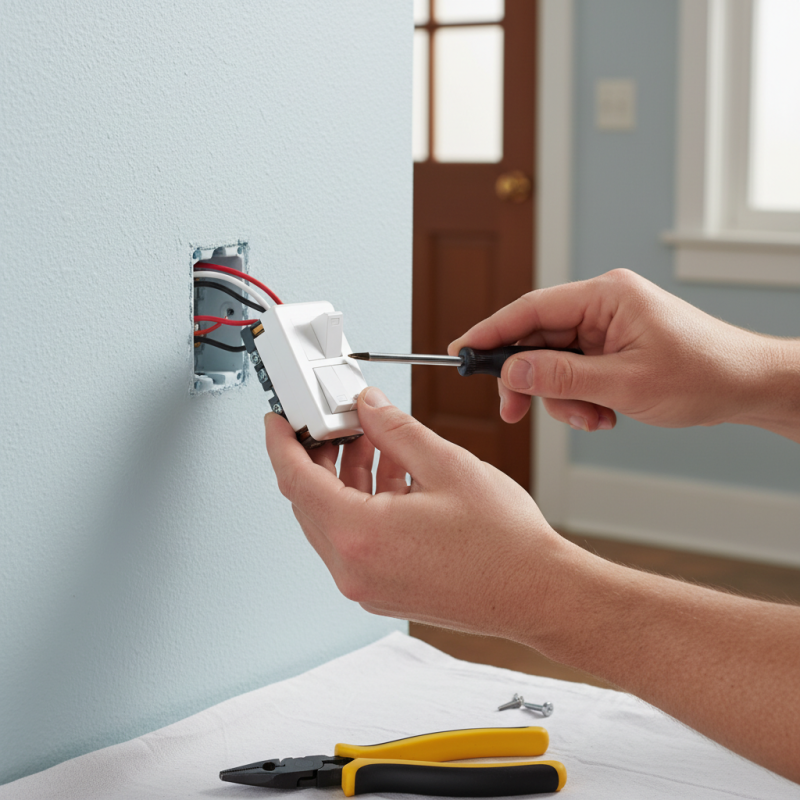
The first step is gathering the right tools. You will need wire strippers, screws, and a screwdriver. It’s easy to overlook this. Make sure you check your tools before beginning.
Next, turning off the power to the circuit is essential. Ignoring this step can lead to accidents. Be cautious and verify that the power is off. When connecting wires, proper arrangement is crucial. Incorrect wiring can cause the switch to malfunction or fail. Installing a Double Rocker Switch correctly requires attention to detail and patience. Each step needs your focus to avoid mistakes.
Understanding the Components of a Double Rocker Switch
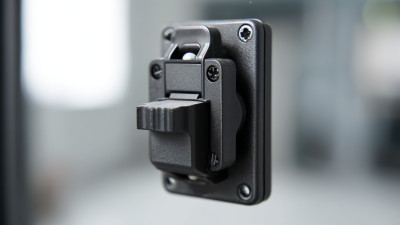
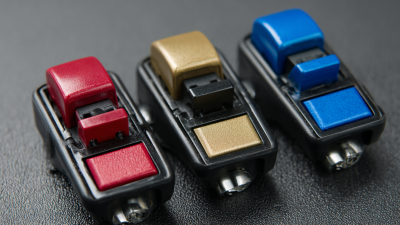
A double rocker switch consists of two separate parts controlled by a single actuator. Each side controls a different circuit or device. This design allows for versatile usage in a single switch unit. Understanding the components is vital for efficient installation and use.
Each rocker switch has a housing that protects the internal mechanisms. Inside, you will find terminals for electrical connections. Pay attention to the wire placement for each terminal when connecting.
At times, people overlook how tight the connections should be. Loose wires can cause flickering or malfunction. You might encounter confusing wiring instructions. Double-checking ensures a secure fit. Take your time to familiarize yourself with the components before starting installation. A little patience goes a long way in avoiding mistakes.
Double Rocker Switch Installation - Component Usage
Preparing Your Workspace for Installation
Preparing your workspace for installing a double rocker switch is crucial. A clean, organized area helps prevent mistakes. Choose a flat surface. This will help you work better. Make sure there is adequate lighting. You need to see the wires clearly.
Gather all necessary tools first. A screwdriver and wire strippers are essential. Have a multimeter handy for testing. It can prevent electrical mishaps. Check that your circuit is off. Safety should be your top priority. A quick glance at your workspace can reveal if you missed anything.
Consider using a small box for screws and small parts. It saves time searching later. Keep your tools within reach, but off the workspace. This creates a neat area. However, don’t expect perfection. You might still find a stray tool on your table. Adjust and improve your setup as you go. This is part of the learning process.
Wiring the Double Rocker Switch: A Step-by-Step Guide
Wiring a double rocker switch can seem intimidating at first. However, breaking it down into simple steps makes the process much easier. Start by ensuring the power is off at the circuit breaker. This is crucial for your safety. Prepare your tools and materials. You'll need wire strippers, a screwdriver, and electrical tape.
Next, look closely at the switch terminals. Identify the common terminal and the two load terminals. Strip the ends of each wire, exposing enough copper for a secure connection. Connect the hot wire to the common terminal. The other two wires will connect to the load terminals. It’s important to follow the wiring diagram. Mistakes can lead to malfunction.
Double-check each connection before restoring power. Sometimes, the wires can be difficult to secure. A loose connection might cause flickering lights. If everything looks good, turn the power back on and test the switch. Be patient if it doesn't work the first time. Troubleshooting requires persistence. This whole process can be a bit tedious, but it’s rewarding once everything lights up!
How to Install a Double Rocker Switch Correctly? - Wiring the Double Rocker Switch: A Step-by-Step Guide
| Step |
Description |
Tools Required |
Safety Tips |
| 1 |
Turn off power at the circuit breaker. |
Screwdriver, Voltage Tester |
Always verify the power is off before touching wires. |
| 2 |
Remove the existing switch cover and switch. |
Screwdriver |
Wear safety glasses during removal. |
| 3 |
Identify the wire connections from the old switch. |
Wire Strippers |
Ensure wires are not live by testing again. |
| 4 |
Connect the wires to the new double rocker switch. |
Wire Connectors |
Follow the wiring diagram carefully. |
| 5 |
Secure the switch in the electrical box and replace the cover. |
Screwdriver |
Ensure the cover is properly fastened. |
| 6 |
Turn the power back on and test the switch. |
Voltage Tester |
Stay clear of the switch while testing. |
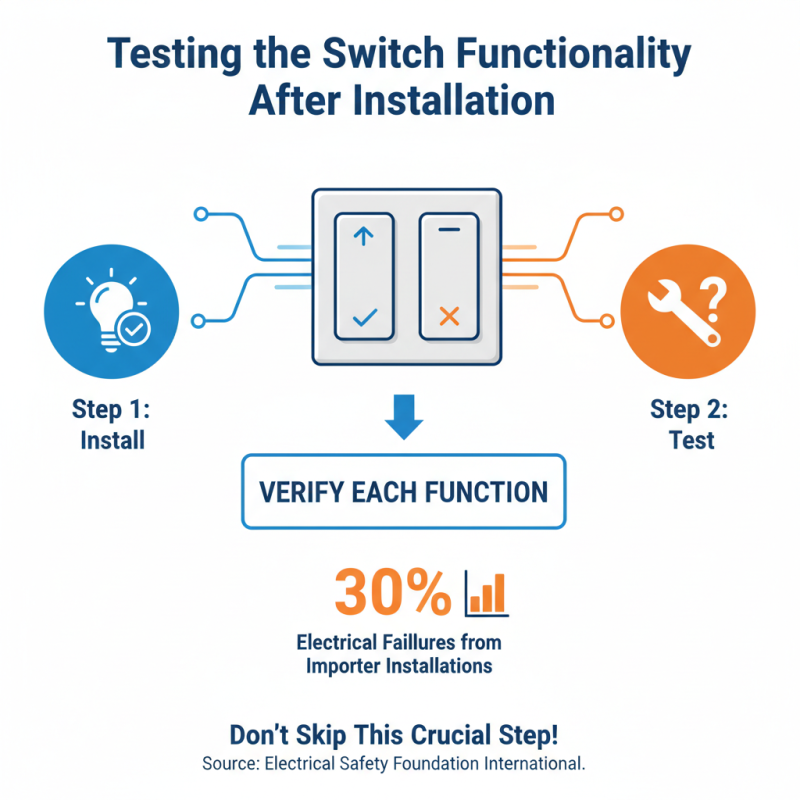
Testing the Switch Functionality After Installation
After installing a double rocker switch, it’s crucial to test its functionality. Many users overlook this step. A report by the Electrical Safety Foundation International indicated that nearly 30% of electrical failures stem from improper installations. This statistic highlights how important it is to verify each function after installation.
Begin testing by flipping both rockers. You should hear a clear click. If you don’t, something may be wrong. Check if the wiring is secure. Loose connections can lead to a poor experience. According to the National Fire Protection Association, inadequate electrical work causes thousands of fires annually. It's a sobering thought, pushing us to ensure every detail is perfect.
Be aware of potential issues during testing. Occasionally, switches may feel sticky or don’t return to the default position. This can indicate a fault. If you experience this, double-check your wiring or consider replacing the unit. Minor hiccups can lead to major problems. A careful inspection ensures safety and reliability, which should always be a priority.
Common Mistakes to Avoid During Installation
Installing a double rocker switch can seem straightforward, but common mistakes can complicate the process. One frequent error is not turning off the power. According to a 2020 safety report, nearly 30% of DIY electrical accidents occur due to neglecting this crucial step. Always check the circuit breaker before starting.
Another mistake is incorrect wiring. Misconfiguring the connections can damage both the switch and the electrical system. An industry survey indicated that 40% of installation failures stem from poor wiring practices. Ensure that you’re following the wiring diagram correctly. It’s also easy to overlook the secure mounting of the switch, which can lead to faults later on.
Using the wrong tools adds another layer of complexity. Many users underestimate this aspect. A report by the Electrical Safety Foundation revealed that improper tool use increases the risk factor during installations by 25%. Always choose the right tools to ensure a safe and effective installation. Each of these missteps highlights the importance of caution and attention to detail when working with electrical components.